Perform Updates in Embedded Clusters
This topic describes how to perform updates for Replicated Embedded Cluster installations.
If you are instead looking for information about Replicated kURL, see Perform Updates in kURL Clusters.
Overview
When you update an application installed with Embedded Cluster, you update both the application and the cluster infrastructure together, including Kubernetes, KOTS, and other components running in the cluster. There is no need or mechanism to update the infrastructure on its own.
When you deploy a new version, any changes to the cluster are deployed first. The Admin Console waits until the cluster is ready before updatng the application.
Any changes made to the Embedded Cluster Config, including changes to the Embedded Cluster version, Helm extensions, and unsupported overrides, trigger a cluster update.
When performing an upgrade with Embedded Cluster, the user is able to change the application config before deploying the new version. Additionally, the user's license is synced automatically. Users can also make config changes and sync their license outside of performing an update. This requires deploying a new version to apply the config change or license sync.
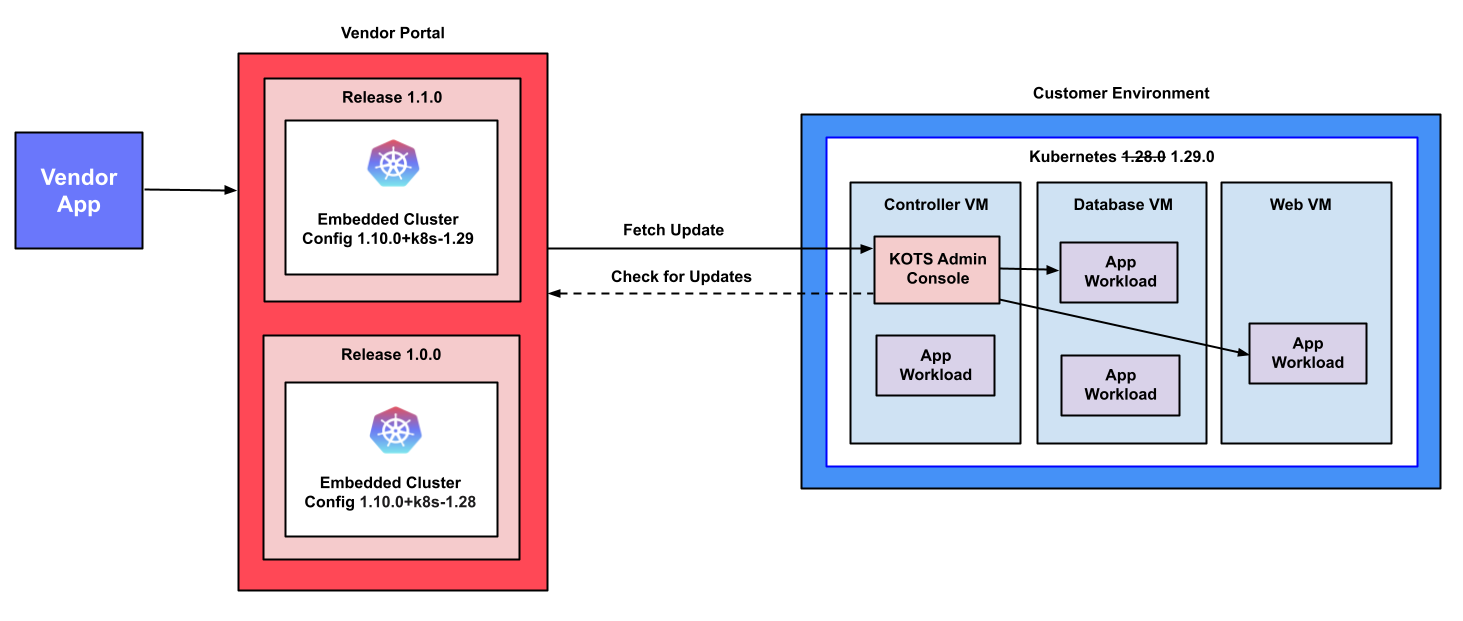
The following diagram demonstrates how updates are performed with Embedded Cluster in online (internet-connected) environments:
View a larger version of this image
As shown in the diagram above, users check for available updates from the KOTS Admin Console. When deploying the new version, both the application and the cluster infrastructure are updated as needed.
Update in Online Clusters
Do not downgrade the Embedded Cluster version, downgrade the Kubernetes version, nor upgrade Kubernetes by more than one minor version at a time. These actions are not prevented by the Admin Console and can lead to unexpected behavior. For more information, see Limitations in Embedded Cluster Overview.
To perform an update with Embedded Cluster:
-
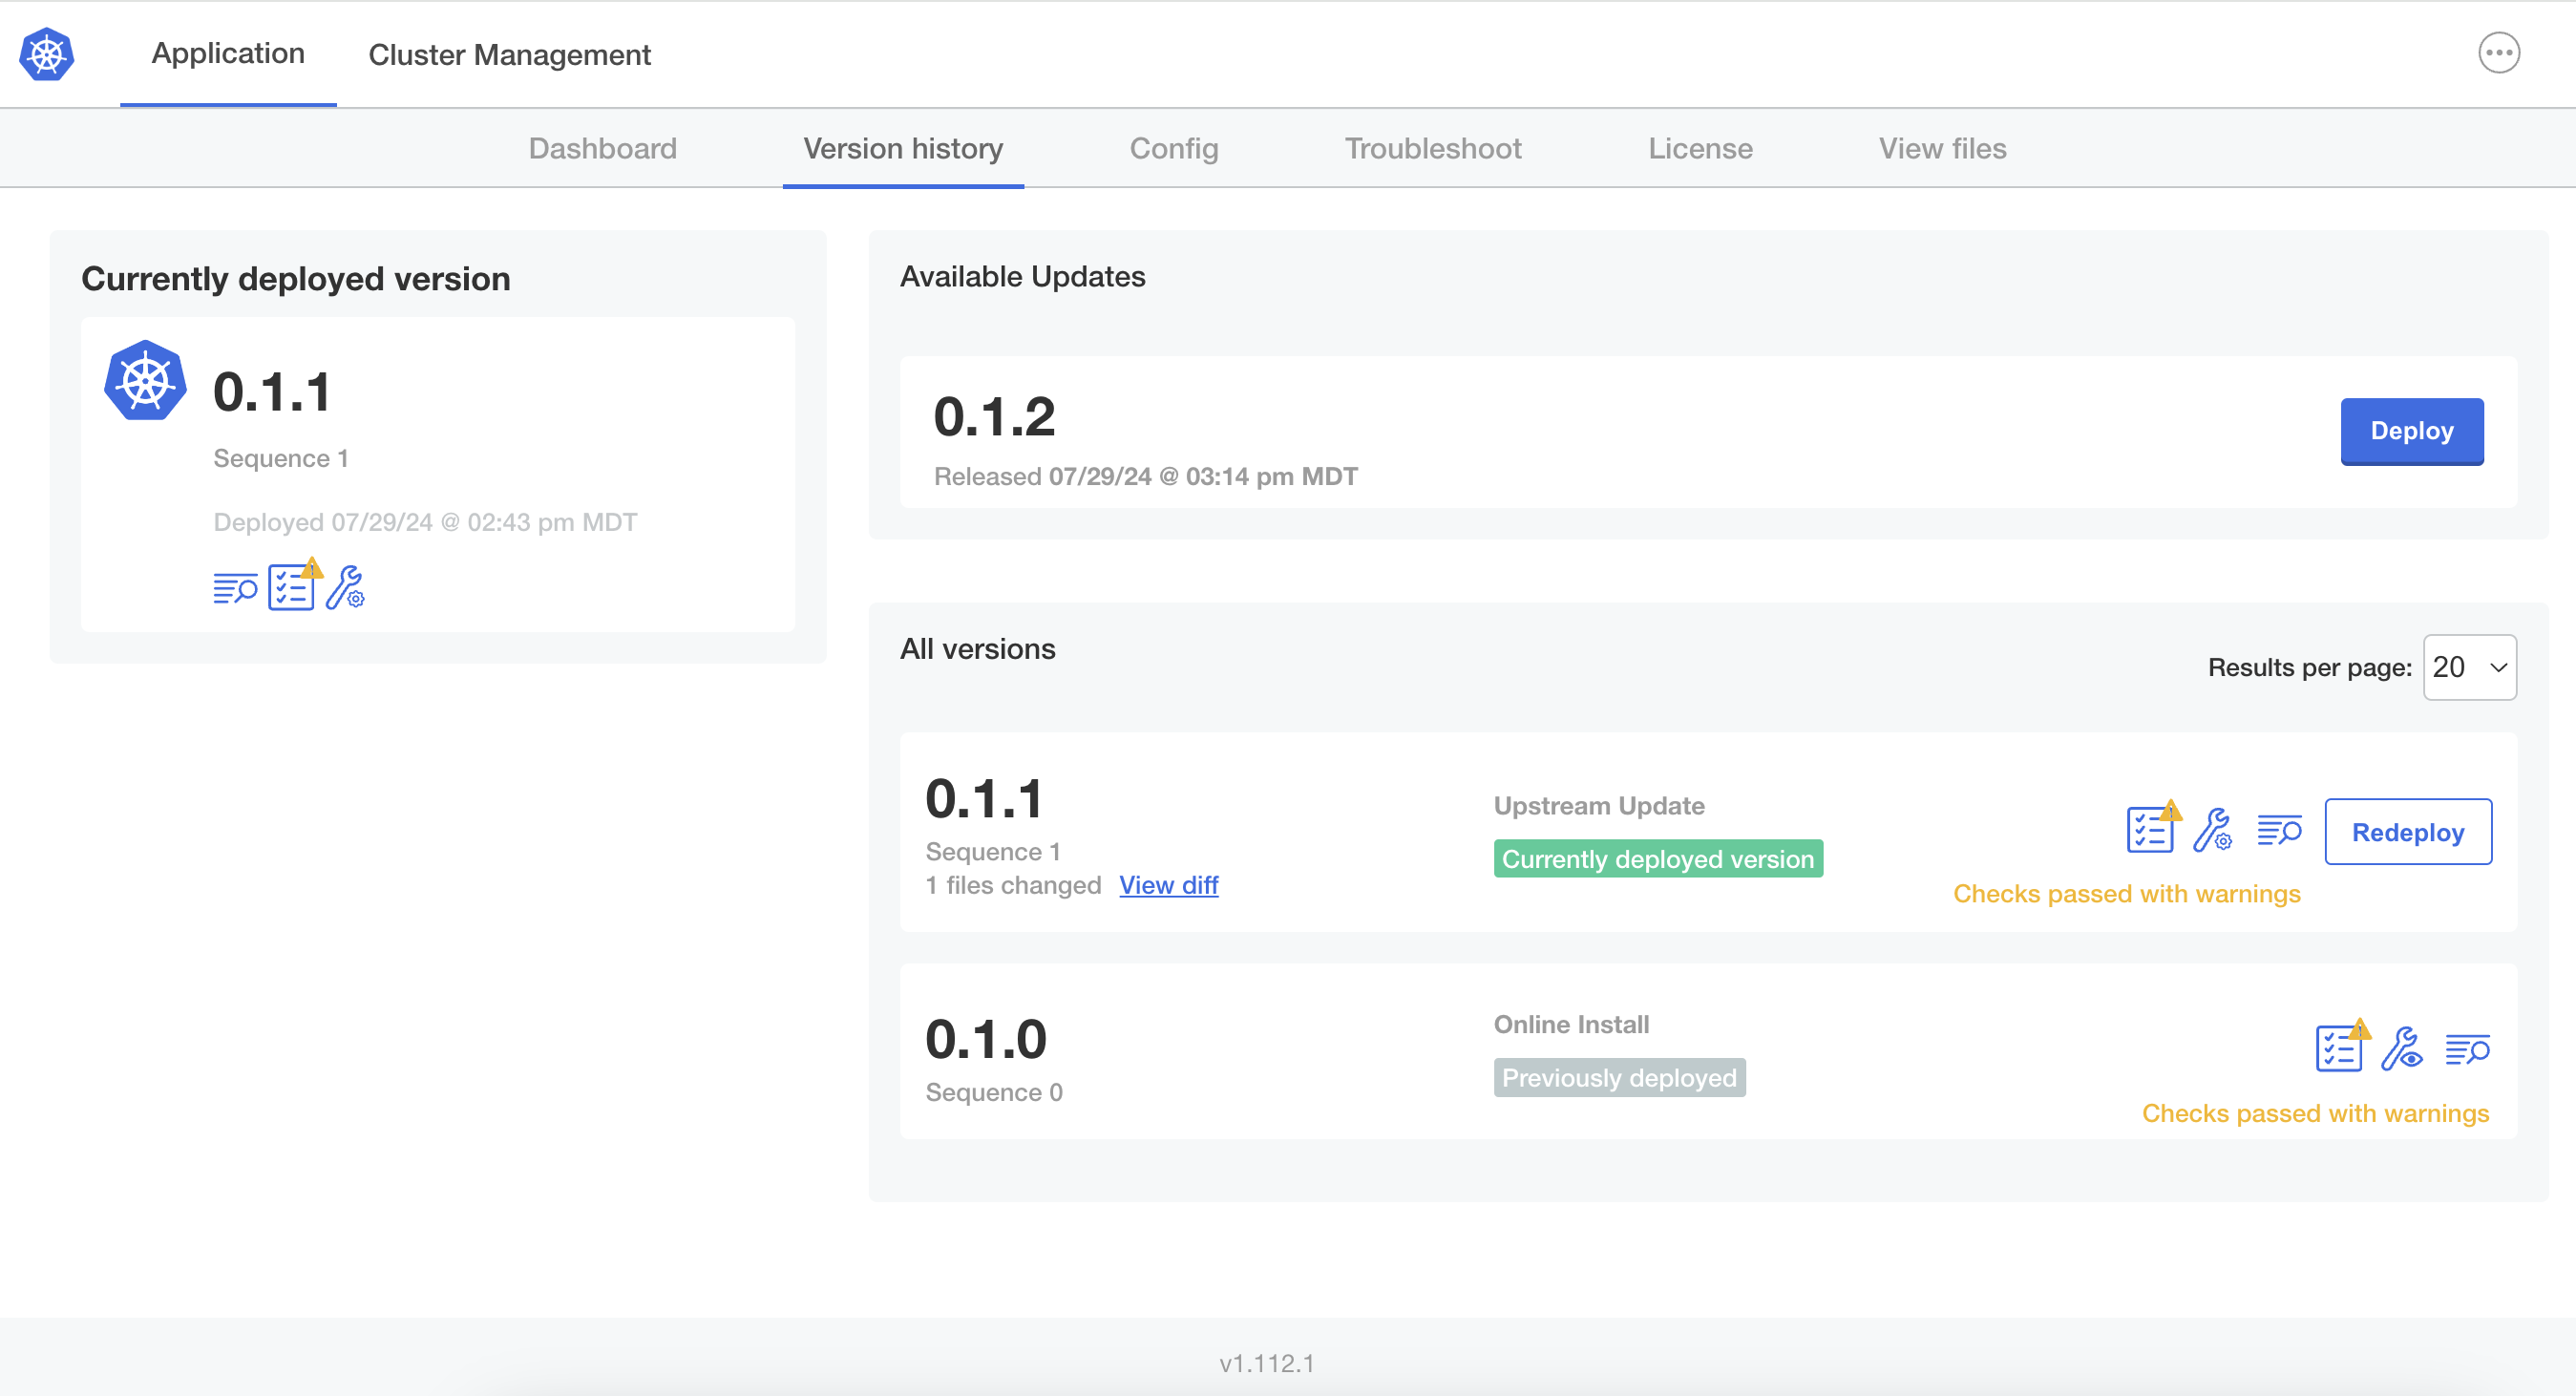
In the Admin Console, go to the Version history tab.
All versions available for upgrade are listed in the Available Updates section:
-
Click Deploy next to the target version.
-
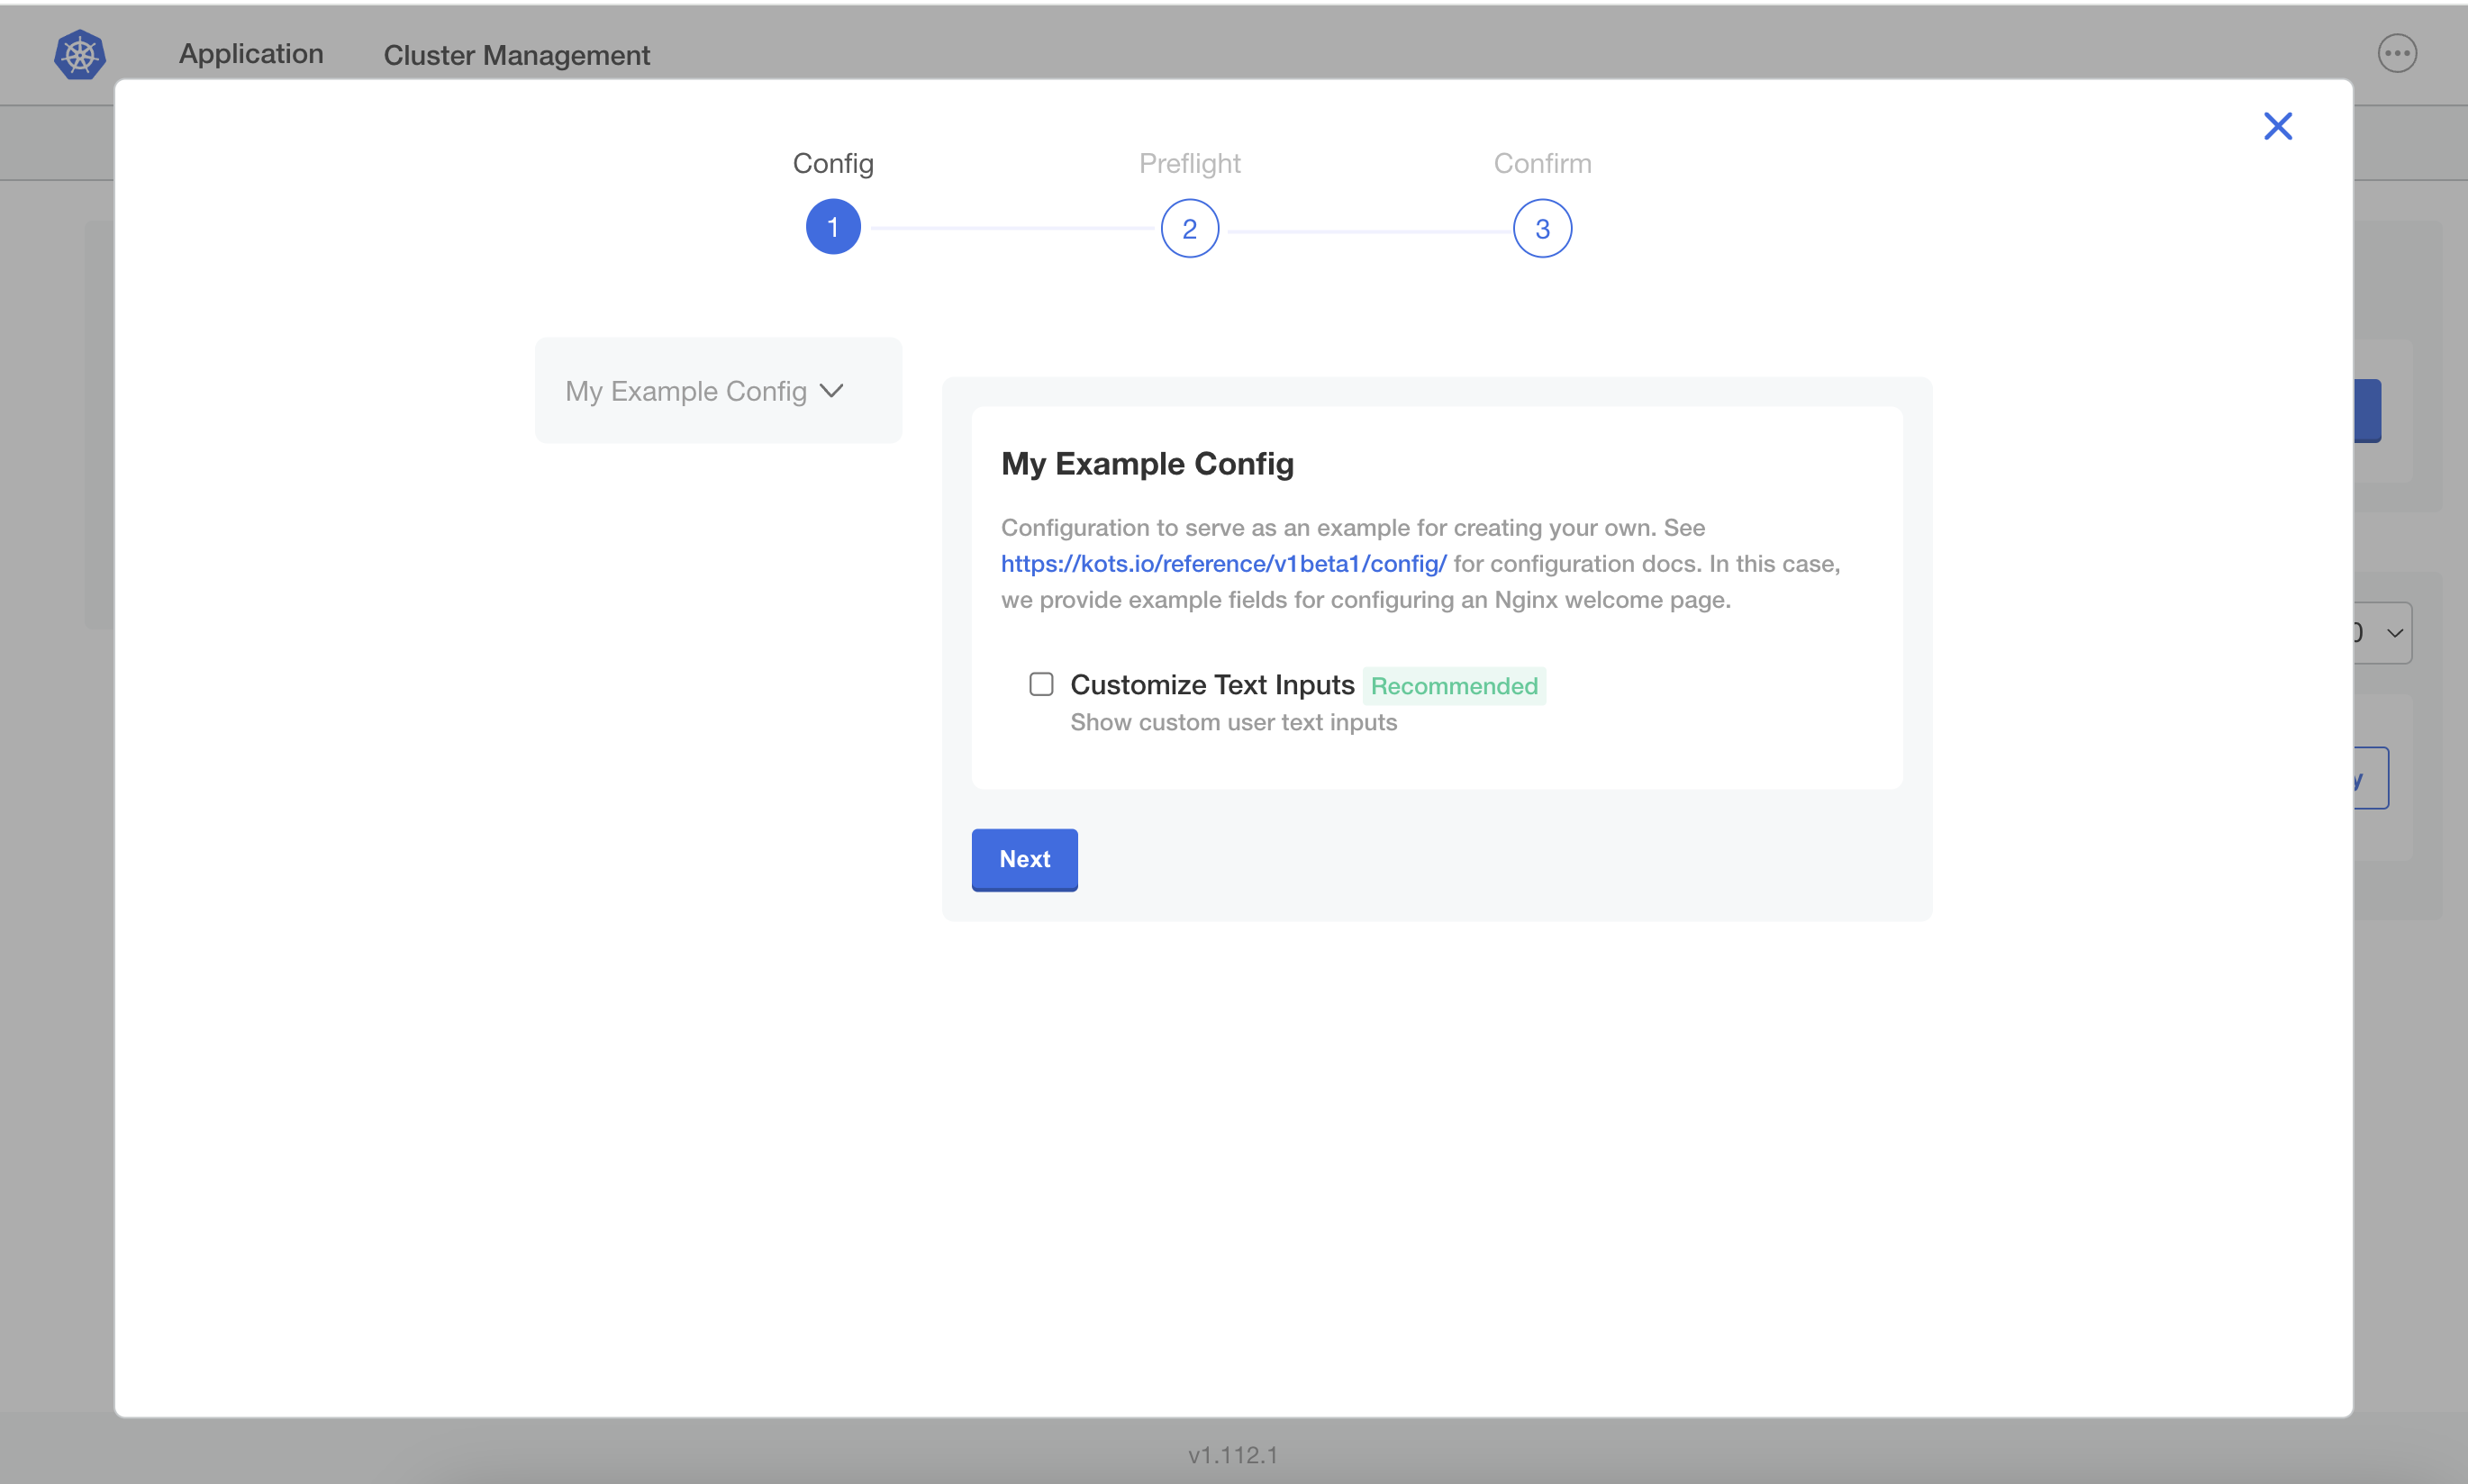
On the Config screen of the upgrade wizard, make any necessary changes to the configuration for the application. Click Next.
View a larger version of this image
noteAny changes made on the Config screen of the upgrade wizard are not set until the new version is deployed.
-
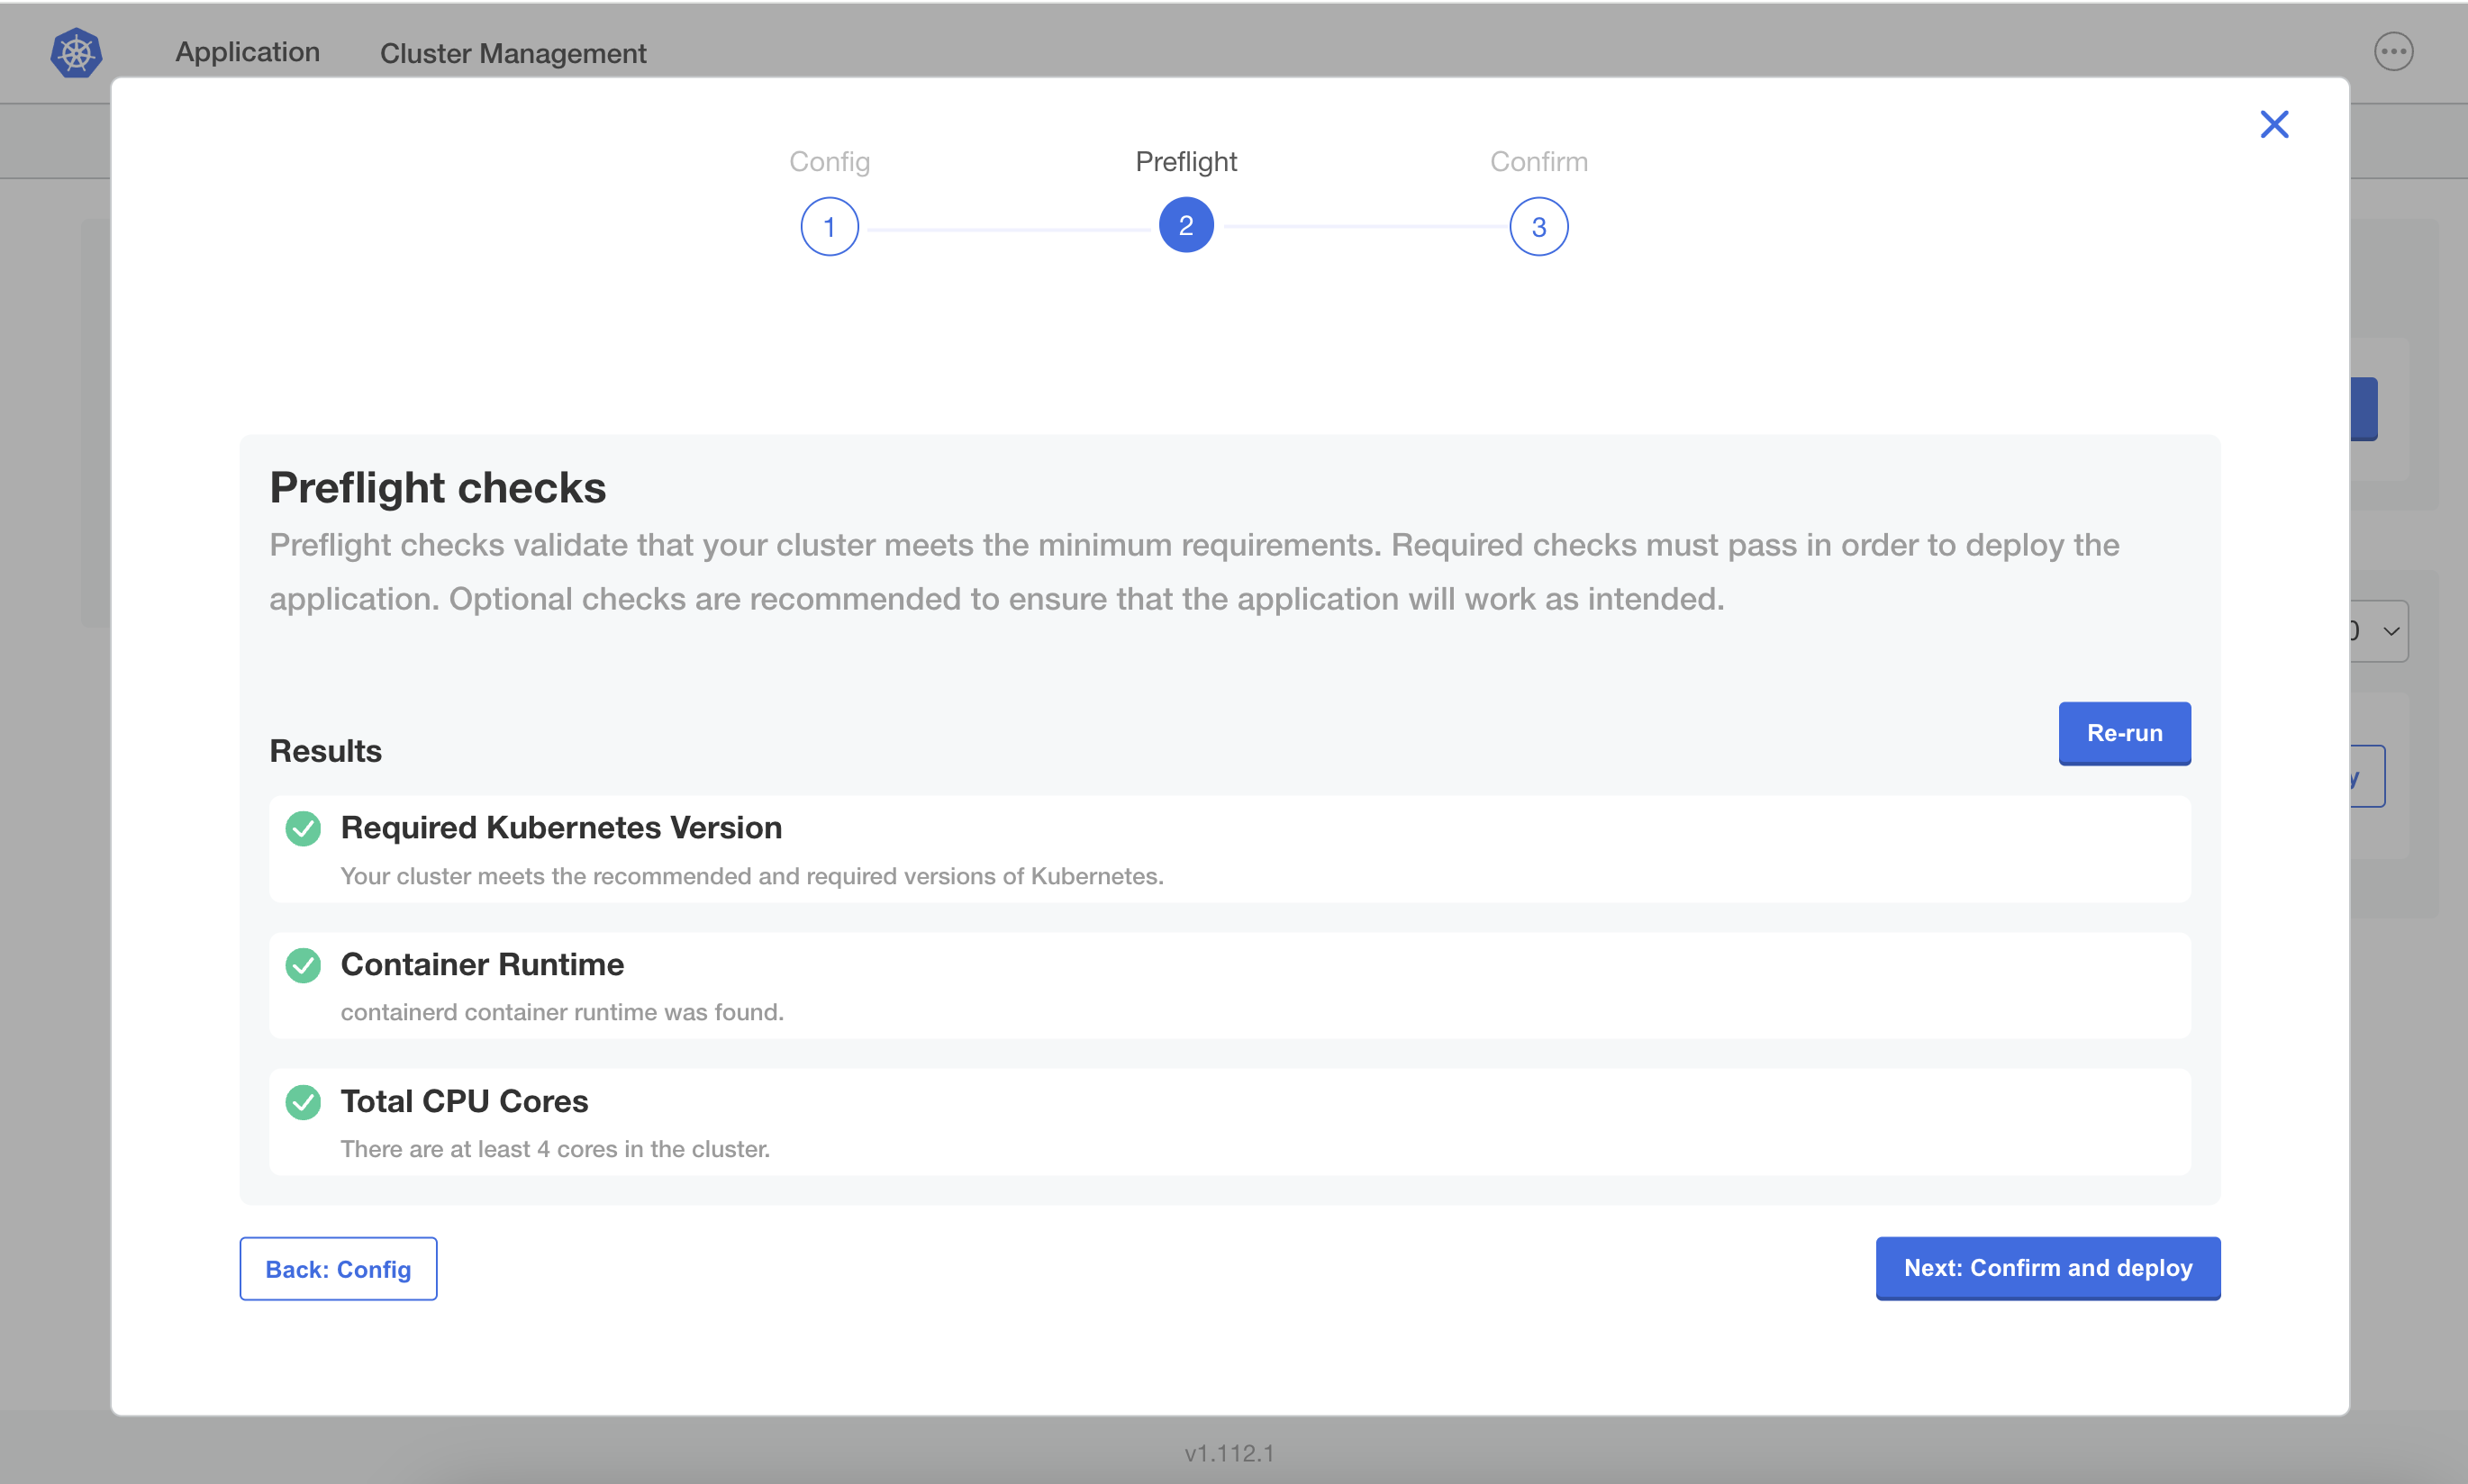
On the Preflight screen, view the results of the preflight checks.
-
On the Confirm screen, click Deploy.
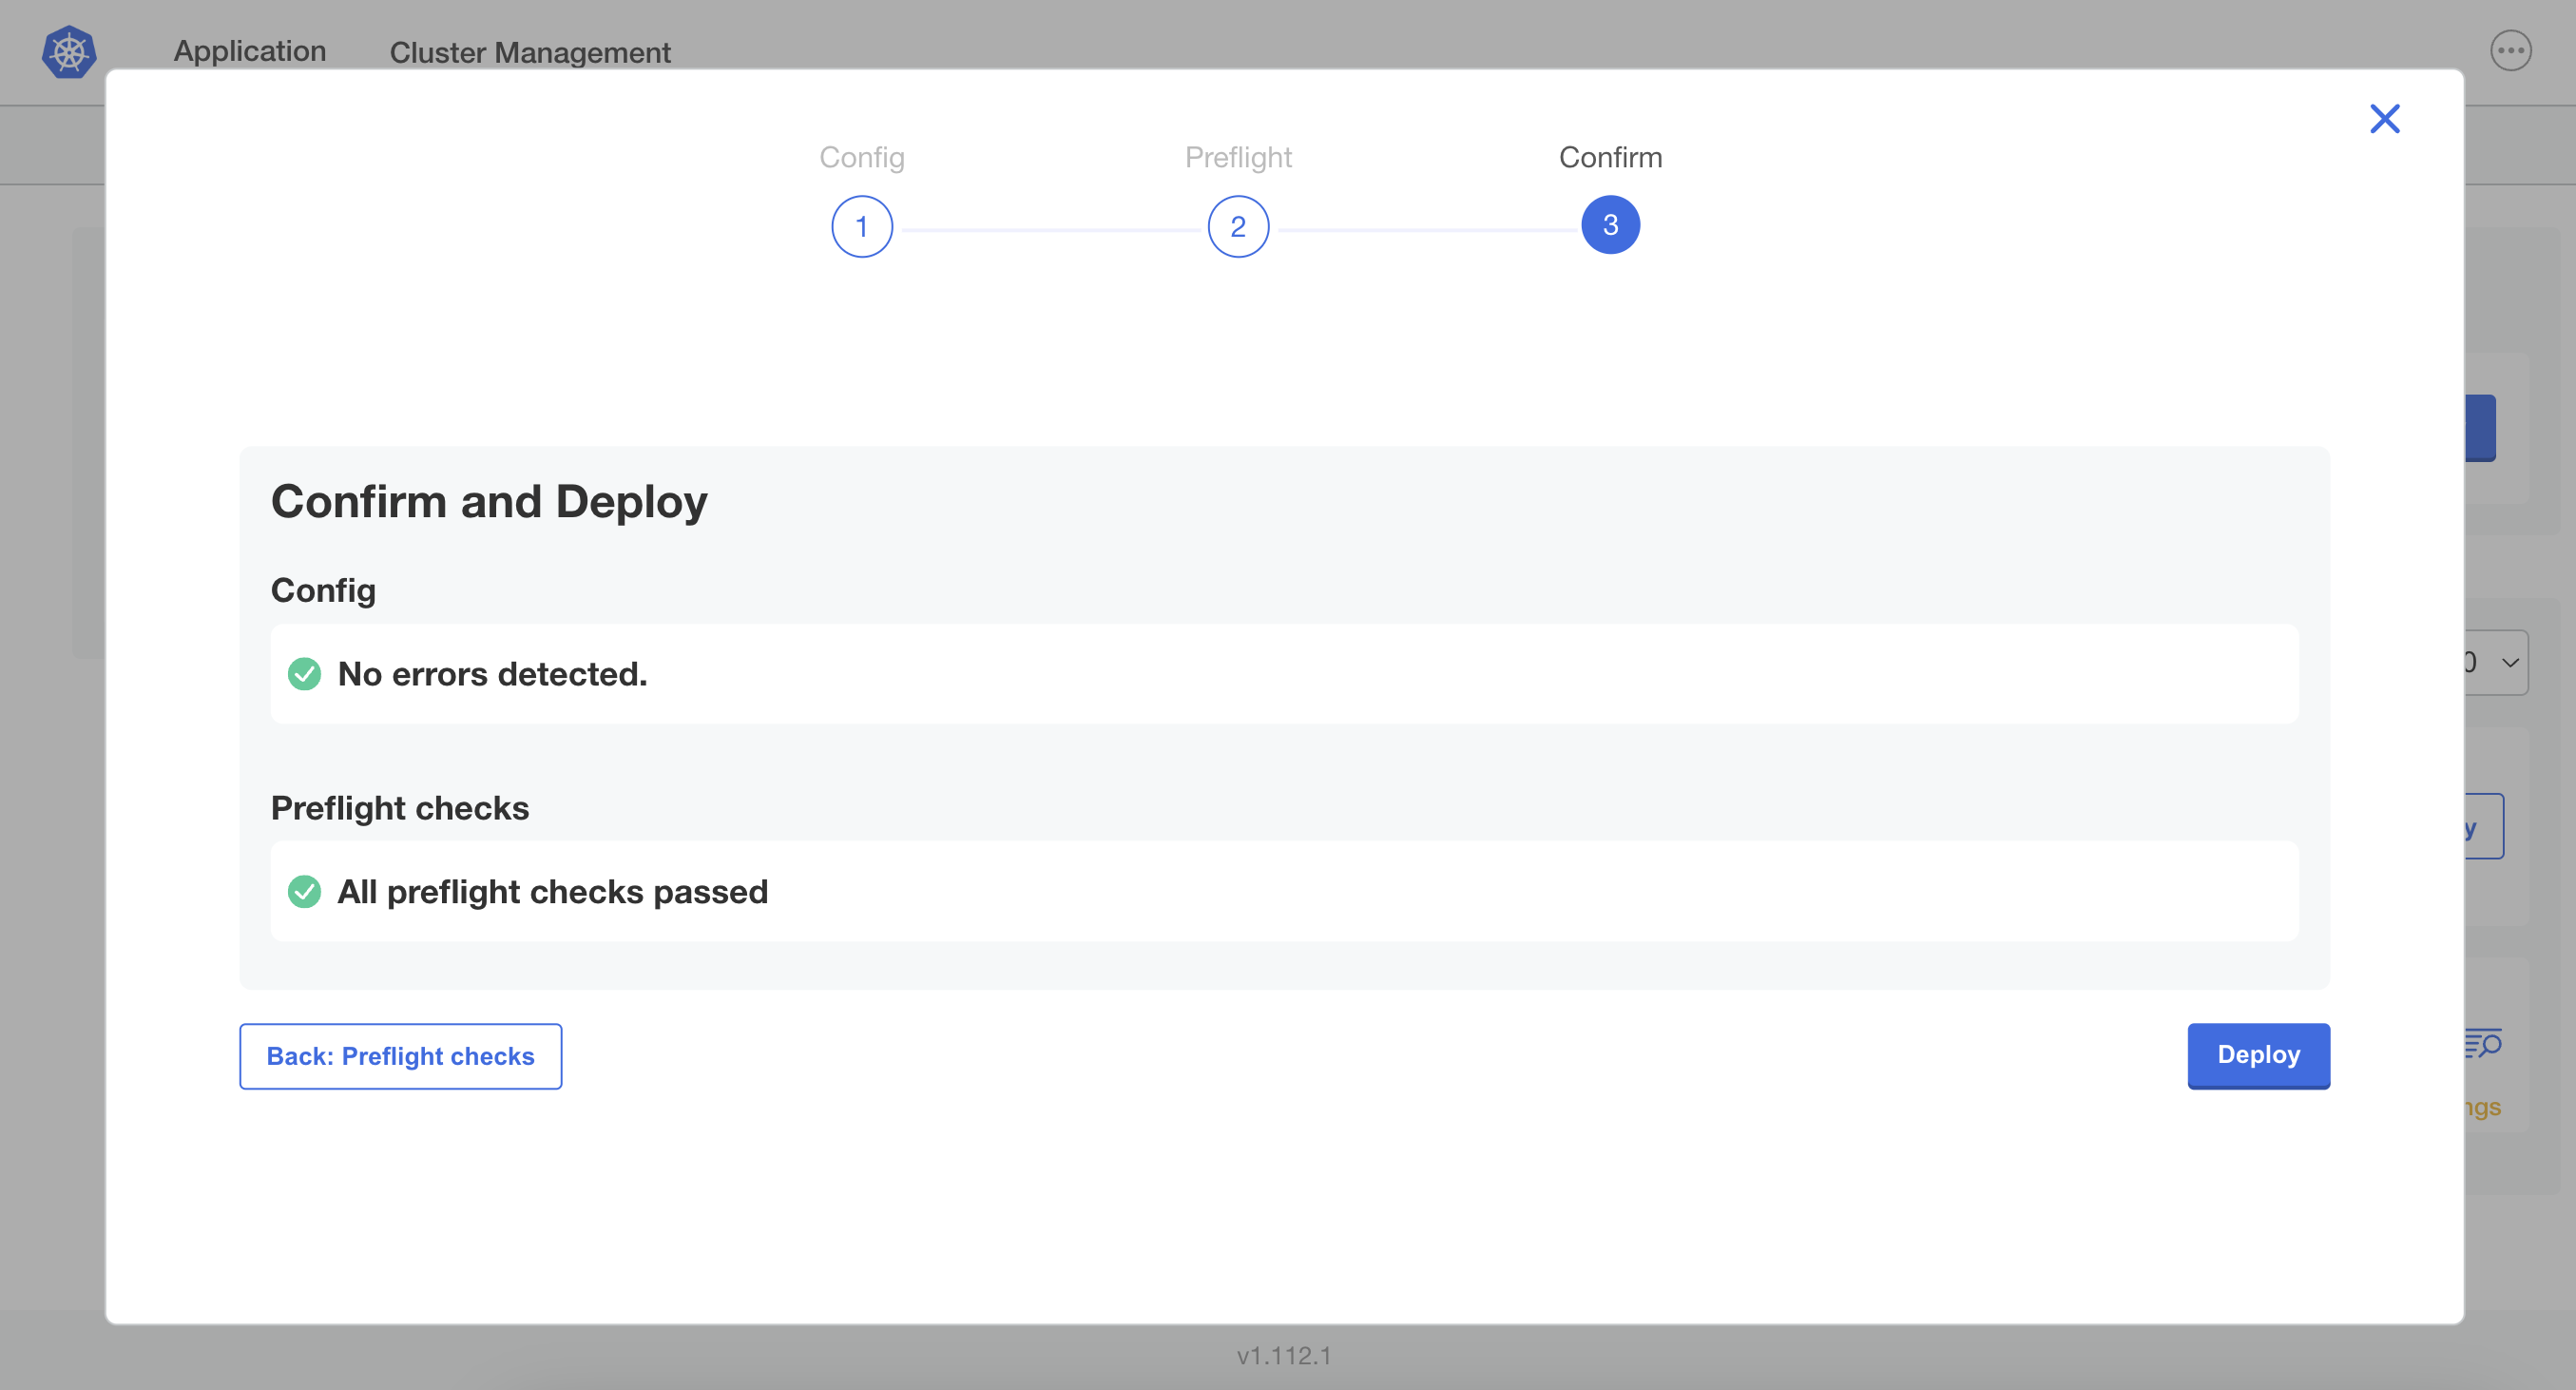
View a larger version of this image
During updates, the Admin Console is unavailable. A modal is displayed with a message that the update is in progress.
noteKOTS can experience downtime during an update, such as in single-node installations. If downtime occurs, refreshing the page results in a connection error. Users can refresh the page again after the update is complete to access the Admin Console.
Update in Air Gap Clusters
Do not downgrade the Embedded Cluster version, downgrade the Kubernetes version, nor upgrade Kubernetes by more than one minor version at a time. These actions are not prevented by the Admin Console and can lead to unexpected behavior. For more information, see Limitations in Embedded Cluster Overview.
To upgrade an installation, new air gap bundles can be uploaded to the Admin Console from the browser or with the Embedded Cluster binary from the command line.
Using the binary is faster and allows the user to download the air gap bundle directly to the machine where the Embedded Cluster is running. Using the browser is slower because the user must download the air gap bundle to a machine with a browser, then upload that bundle to the Admin Console, and then the Admin Console can process it.
Upload the New Version From the Command Line
To update by uploading the air gap bundle for the new version from the command line:
-
SSH onto a controller node in the cluster and download the air gap bundle for the new version using the same curl command that you used to install. For example:
curl -f https://replicated.app/embedded/APP_SLUG/CHANNEL_SLUG?airgap=true -H "Authorization: LICENSE_ID" -o APP_SLUG-CHANNEL_SLUG.tgzFor more information, see Install.
-
Untar the tarball. For example:
tar -xvzf APP_SLUG-CHANNEL_SLUG.tgzEnsure that the
.airgapair gap bundle is present. -
Use the
updatecommand to upload the air gap bundle and make this new version available in the Admin Console. For example:./APP_SLUG update --airgap-bundle APP_SLUG.airgap -
When the air gap bundle has been uploaded, open a browser on the same machine and go to the Admin Console.
-
On the Version history page, click Deploy next to the new version.

-
On the Config screen of the upgrade wizard, make any necessary changes to the configuration for the application. Click Next.

View a larger version of this image
noteAny changes made on the Config screen of the upgrade wizard are not set until the new version is deployed.
-
On the Preflight screen, view the results of the preflight checks.

-
On the Confirm screen, click Deploy.

Upload the New Version From the Admin Console
To update by uploading the air gap bundle for the new version from the Admin Console:
-
On a machine with browser access (for example, where you accessed the Admin Console to configure the application), download the air gap bundle for the new version using the same curl command that you used to install. For example:
curl -f https://replicated.app/embedded/APP_SLUG/CHANNEL_SLUG?airgap=true -H "Authorization: LICENSE_ID" -o APP_SLUG-CHANNEL_SLUG.tgzFor more information, see Install.
-
Untar the tarball. For example:
tar -xvzf APP_SLUG-CHANNEL_SLUG.tgzEnsure that the
.airgapair gap bundle is present. -
On the same machine, use a browser to access the Admin Console.
-
On the Version history page, click Upload new version and choose the
.airgapair gap bundle you downloaded. -
When the air gap bundle has been uploaded, click Deploy next to the new version.
-
On the Config screen of the upgrade wizard, make any necessary changes to the configuration for the application. Click Next.

View a larger version of this image
noteAny changes made on the Config screen of the upgrade wizard are not set until the new version is deployed.
-
On the Preflight screen, view the results of the preflight checks.

-
On the Confirm screen, click Deploy.
