Air Gap Installation with Embedded Cluster
This topic describes how to install applications with Embedded Cluster on a virtual machine (VM) or bare metal server with no outbound internet access.
Overview
When an air gap bundle is built for a release containing an Embedded Cluster Config, both an application air gap bundle and an Embedded Cluster air gap bundle are built. The application air gap bundle can be used for air gap installations with Replicated kURL or with Replicated KOTS in an existing cluster. The Embedded Cluster air gap bundle is used for air gap installations with Embedded Cluster.
The Embedded Cluster air gap bundle not only contains the assets normally contained in an application air gap bundle (airgap.yaml, app.tar.gz, and an images directory), but it also contains an embedded-cluster directory with the assets needed to install the infrastructure (Embedded Cluster/k0s and extensions.
During installation with Embedded Cluster in air gap environments, a Docker registry is deployed to the cluster to store application images. Infrastructure images (for Embedded Cluster and Helm extensions) and the Helm charts are preloaded on each node at installation time.
Requirement
Air gap installations are supported with Embedded Cluster version 1.3.0 or later.
Limitations and Known Issues
Embedded Cluster installations in air gap environments have the following limitations and known issues:
-
If you pass
?airgap=trueto thereplicated.appendpoint but an air gap bundle is not built for the latest release, the API will not return a 404. Instead it will return the tarball without the air gap bundle (as in, with the installer and the license in it, like for online installations). -
Images used by Helm extensions must not refer to a multi-architecture image by digest. Only x64 images are included in air gap bundles, and the digest for the x64 image will be different from the digest for the multi-architecture image, preventing the image from being discovered in the bundle. An example of a chart that does this is ingress-nginx/ingress-nginx chart. For an example of how the digests should be set to empty string to pull by tag only, see extensions in Embedded Cluster Config.
-
Images for Helm extensions are loaded directly into containerd so that they are available without internet access. But if an image used by a Helm extension has Always set as the image pull policy, Kubernetes will try to pull the image from the internet. If necessary, use the Helm values to set
IfNotPresentas the image pull policy to ensure the extension works in air gap environments. -
On the channel release history page, the links for Download air gap bundle, Copy download URL, and View bundle contents pertain to the application air gap bundle only, not the Embedded Cluster bundle.
Prerequisites
Before you install, complete the following prerequisites:
-
Ensure that your installation environment meets the Embedded Cluster requirements. See Embedded Cluster Requirements.
-
The application release that you want to install must include an Embedded Cluster Config.
-
The license used to install must have the Embedded Cluster Enabled license field enabled. See Create and Manage Customers.
Install
To install with Embedded Cluster in an air gap environment:
-
In the Vendor Portal, go the channel where the target release was promoted to build the air gap bundle. Do one of the following:
- If the Automatically create airgap builds for newly promoted releases in this channel setting is enabled on the channel, watch for the build status to complete.
- If automatic air gap builds are not enabled, go to the Release history page for the channel and build the air gap bundle manually.
noteErrors in building either the application air gap bundle or the Embedded Cluster infrastructure will be shown if present.
-
Go to Customers and click on the target customer.
-
On the Manage customer tab, under License options, enable the Airgap Download Enabled license field.
-
At the top of the page, click Install instructions > Embedded Cluster.

-
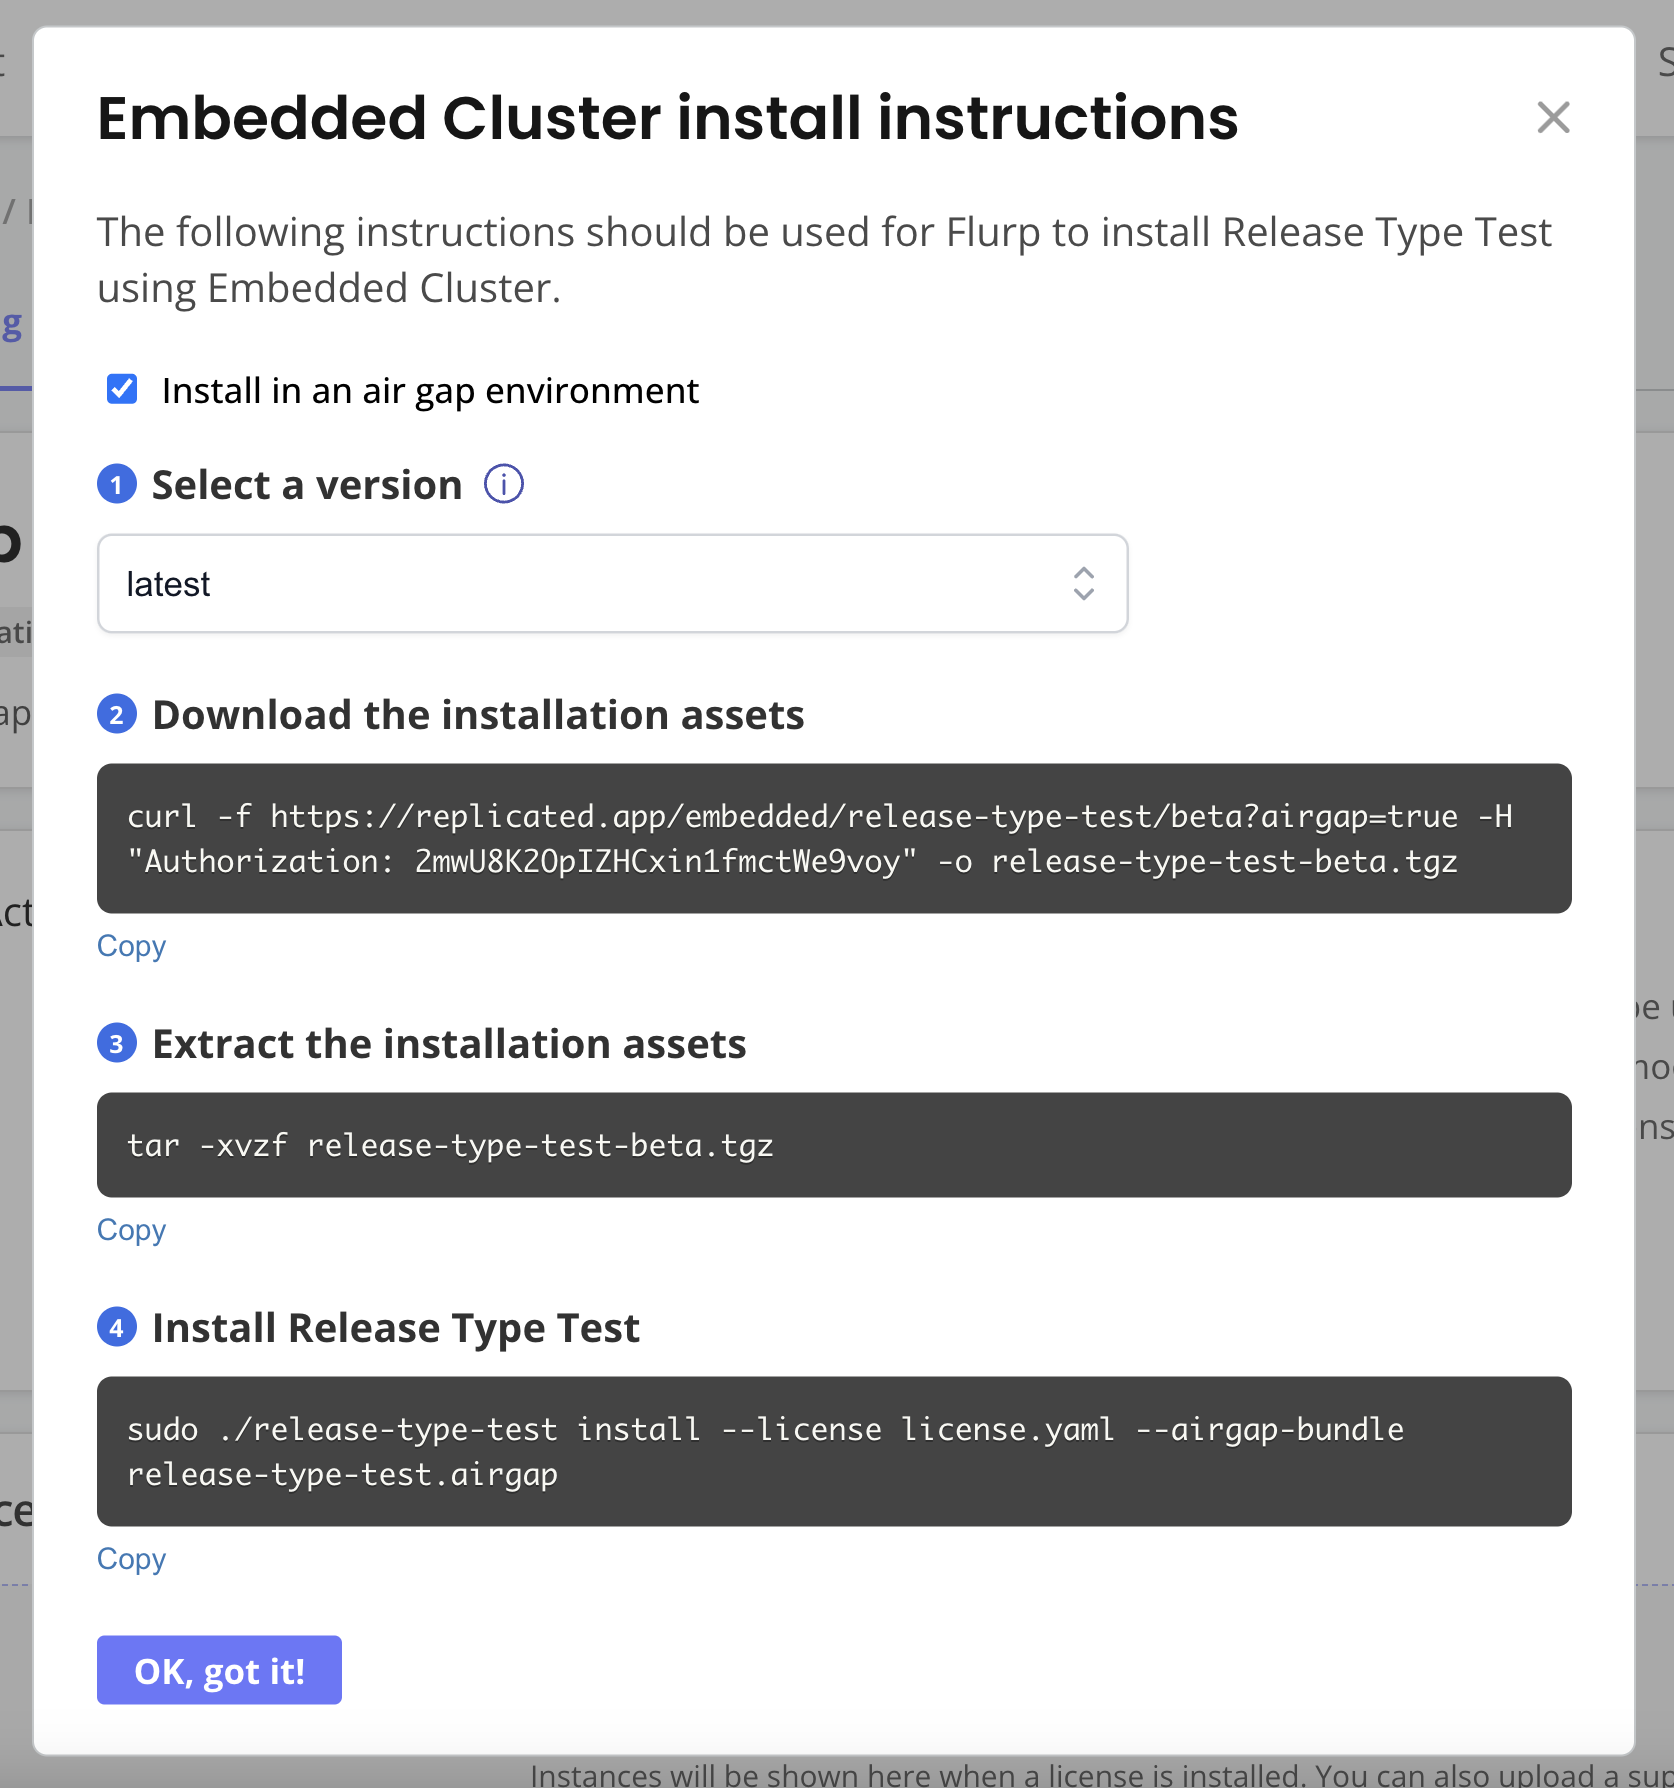
In the Embedded Cluster install instructions dialog, verify that the Install in an air gap environment checkbox is enabled.

-
(Optional) For Select a version, select a specific application version to install. By default, the latest version is selected.
-
SSH onto the machine where you will install.
-
On a machine with internet access, run the curl command to download the air gap installation assets as a
.tgz. -
Move the downloaded
.tgzto the air-gapped machine where you will install. -
On your air-gapped machine, untar the
.tgzfollowing the instructions provided in the Embedded Cluster installation instructions dialog. This will produce three files:- The installer
- The license
- The air gap bundle (
APP_SLUG.airgap)
-
Install the application with the installation command copied from the Embedded Cluster installation instructions dialog:
sudo ./APP_SLUG install --license license.yaml --airgap-bundle APP_SLUG.airgapWhere
APP_SLUGis the unique application slug.noteEmbedded Cluster supports installation options such as installing behind a proxy and changing the data directory used by Embedded Cluster. For the list of flags supported with the Embedded Cluster
installcommand, see install. -
When prompted, enter a password for accessing the KOTS Admin Console.
The installation command takes a few minutes to complete. During installation, Embedded Cluster completes tasks to prepare the cluster and install KOTS in the cluster. Embedded Cluster also automatically runs a default set of host preflight checks which verify that the environment meets the requirements for the installer.
Example output:
? Enter an Admin Console password: ********
? Confirm password: ********
✔  Host files materialized!
✔  Running host preflights
✔  Node installation finished!
✔  Storage is ready!
✔  Embedded Cluster Operator is ready!
✔  Admin Console is ready!
✔  Additional components are ready!
Visit the Admin Console to configure and install gitea-kite: http://104.155.145.60:30000
At this point, the cluster is provisioned and the Admin Console is deployed, but the application is not yet installed.
-
Go to the URL provided in the output to access to the Admin Console.
-
On the Admin Console landing page, click Start.
-
On the Secure the Admin Console screen, review the instructions and click Continue. In your browser, follow the instructions that were provided on the Secure the Admin Console screen to bypass the warning.
-
On the Certificate type screen, either select Self-signed to continue using the self-signed Admin Console certificate or click Upload your own to upload your own private key and certificacte.
By default, a self-signed TLS certificate is used to secure communication between your browser and the Admin Console. You will see a warning in your browser every time you access the Admin Console unless you upload your own certificate.
-
On the login page, enter the Admin Console password that you created during installation and click Log in.
-
On the Nodes page, you can view details about the machine where you installed, including its node role, status, CPU, and memory.
Optionally, add nodes to the cluster before deploying the application. For more information about joining nodes, see Manage Multi-Node Clusters with Embedded Cluster. Click Continue.
-
On the Configure [App Name] screen, complete the fields for the application configuration options. Click Continue.
-
On the Validate the environment & deploy [App Name] screen, address any warnings or failures identified by the preflight checks and then click Deploy.
Preflight checks are conformance tests that run against the target namespace and cluster to ensure that the environment meets the minimum requirements to support the application.
The Admin Console dashboard opens.
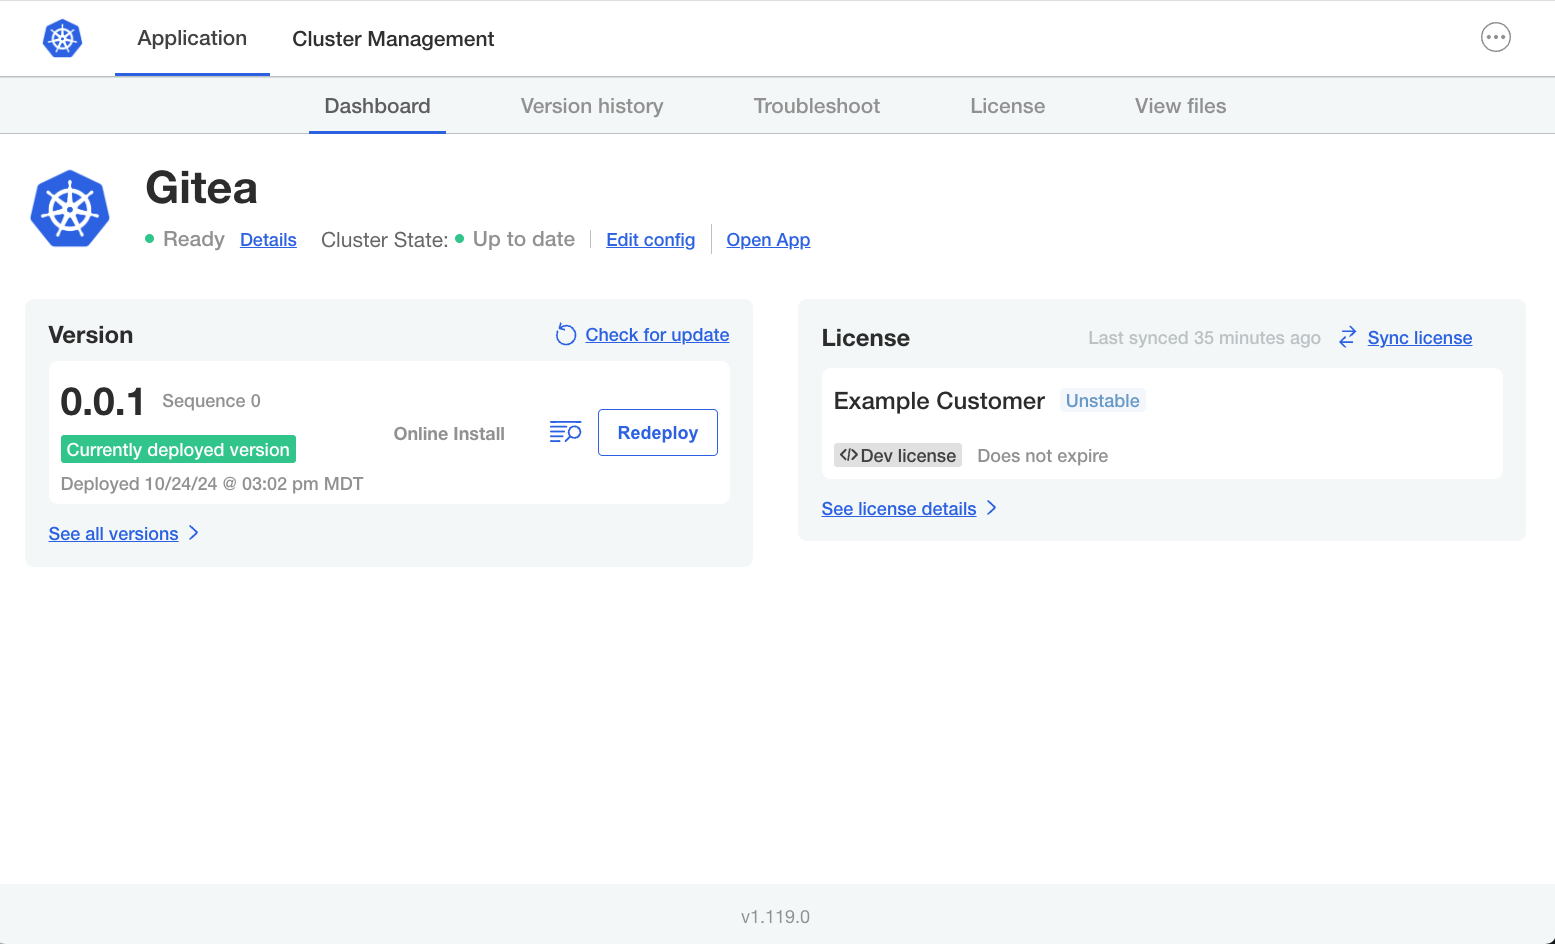
On the Admin Console dashboard, the application status changes from Missing to Unavailable while the application is being installed. When the installation is complete, the status changes to Ready. For example:
