Manage event notification subscriptions
This topic describes how to view, edit, mute, disable, and delete event notifications in the Replicated Vendor Portal. For more information about the Event Notifications feature, see About event notifications.
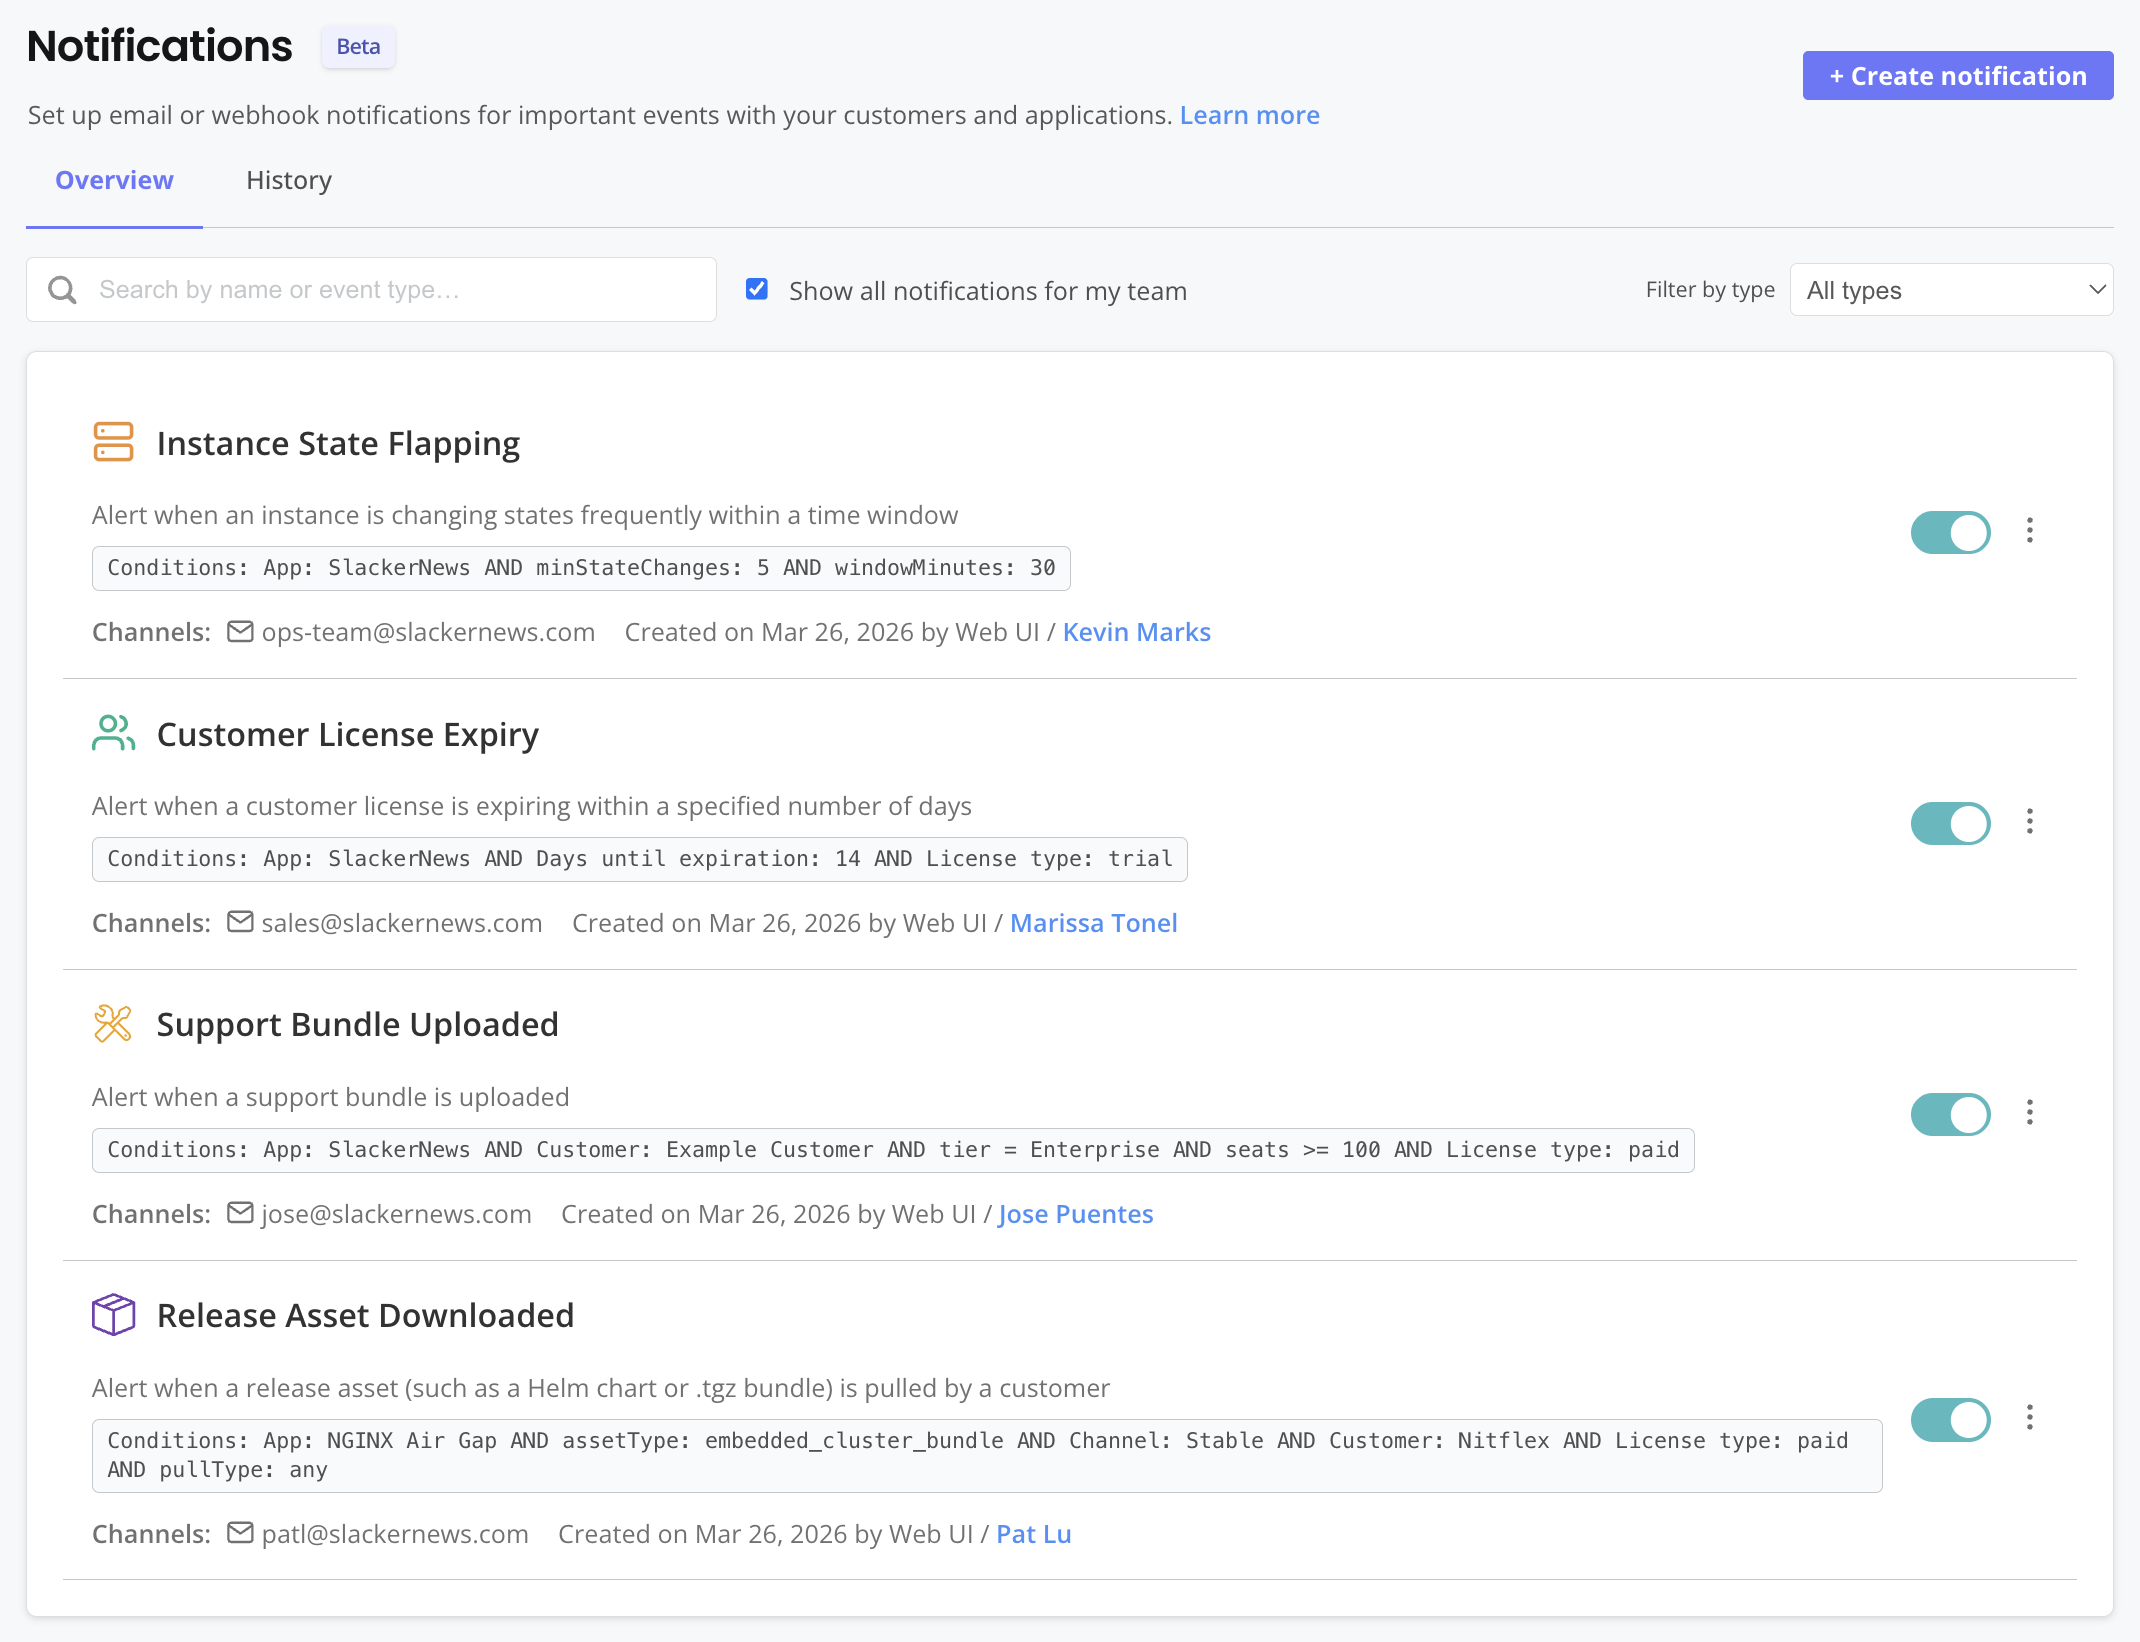
View notification subscriptions
For each notification subscription, you can view the delivery channel (email or webhook), the delivery address, the date created, and who created it. If a custom name is set, it appears as the card title. You can also use the search bar or filters to find subscriptions by name or event type, or view subscriptions created by other team members.
To view notification subscriptions:
-
In the Vendor Portal, go to Notifications > Overview. Use the search bar or filters to find notification subscriptions.
The following shows an example of the notifications Overview page:
View notification history and status
The Notifications > History page shows all triggered notification events for the selected time period. You can filter the history to show only your notifications or filter by a specific notification, including deleted subscriptions. You can also click on an event to view details, such as the timestamp, the associated customer instance, and any error messages when applicable.
To view notification history:
-
In the Vendor Portal, go to Notifications > History. Use the search bar or filters to narrow your results.

Resend a failed notification
You can manually resend events with a Failed delivery status.
To resend a failed notification:
- Go to Notifications > History.
- Expand the failed event and click Resend email or Resend webhook.
- Confirm the resend.
Mute health alert notifications for specific instances
For any subscription that alerts on instance health events (such as Custom Metric Threadhold Reached or Instance Version Behind events), you can mute notifications for specific instances. Muting is useful when an instance is in a known degraded state and you want to reduce noise without disabling the subscription entirely.
When you mute health alerts for an instance, the Vendor Portal blocks notifications from the given subscription for that instance. Other subscriptions that apply to the instance are not muted.
The Vendor Portal lists muted instances in a banner at the top of the Notifications > History tab. The subscription card on the Notifications > Overview page also shows a badge with the count of muted instances.
You can mute notifications for the following event types only:
- Instance State Duration
- Instance State Flapping
- Instance Version Behind
- Custom Metric Threshold Reached
Mute an instance
To mute an instance:
- In the Vendor Portal, go to Notifications > History.
- Expand a row for the instance you want to mute.
note
Muting is supported only for subscriptions that alert on instance health events.
- Click Mute instance.
- Select a duration to mute the instance (7 days, 30 days, or Indefinitely), and confirm.
Unmute an instance
To unmute an instance:
- In the Vendor Portal, go to Notifications > History.
- In the banner at the top of the page, click Manage mutes.
- For the target instance, click Unmute.
Update a notification
You can edit any notifications that you created. Team Admins can also edit notifications created by other team members.
Updating a notification does not affect the notification history for past events.
Vendor Portal
To update a notification from the Vendor Portal:
-
In the Vendor Portal, go to Notifications.
-
In the dot menu for the notification that you want to modify, click Edit.
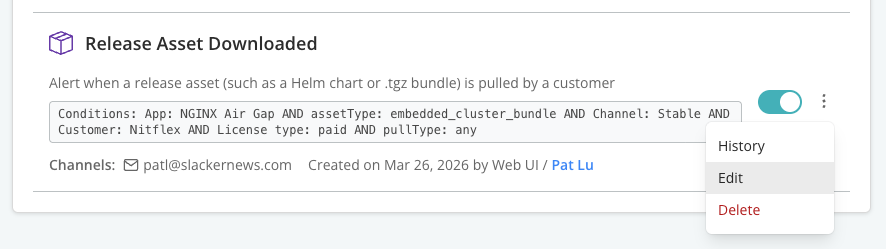
-
Edit the notification's settings. For example:
- Add or update a custom subscription name to help identify the subscription
- Add or remove event types, or modify filters on existing event types to broaden or narrow the scope
- Change the delivery method or destination
- Update the Failure alert contact to change who receives webhook delivery failure notifications
- Check or uncheck the Enable this notification checkbox to pause or unpause the notification
-
Click Save Changes.
Replicated CLI
To update a notification subscription with the CLI:
-
Get the ID of the subscription that you want to update:
replicated notification subscription ls -
(Optional) Get the subscription details in JSON format:
replicated notification subscription get ID --output jsonWhere
IDis the subscription's ID. -
Create a JSON file that includes only the fields you want to change.
For example, to disable a subscription:
{ "isEnabled": false } -
Update the subscription:
replicated notification subscription update ID --file JSON_FILEWhere:
IDis the subscription's ID.JSON_FILEis the path to the file you created.
Temporarily disable a notification
When you disable a notification, it stops triggering for new events. The Vendor Portal saves the subscription configuration and any historical event data is still available.
You can re-enable notifications at any time.
To temporarily disable a notification without deleting its history or configuration:
-
In the Vendor Portal, go to Notifications.
-
In the dot menu for the notification that you want to modify, click Edit.
-
Disable the Enable this notification checkbox at the bottom of the form.
-
Click Save Changes.
Delete a notification
You can delete notifications that you created. Team Admins can also delete notifications created by other team members.
Deleting a notification is permanent and cannot be undone. When you delete a notification, historical event data for the notification remains available in the Vendor Portal Notifications > History view.
To permanently delete a notification:
-
Navigate to Notifications in the Vendor Portal.
-
For the notification that you want to delete, click Delete.
-
Confirm the deletion in the prompt.